
Everybody Likes Screenshots, but...
Because Chambara Cover Slicer is a script that runs in a host application, it doesn't really have an interface of its own. Therefore, all you get instead is this not-so-pretty picture book of how to use Chambara. Bummer. [No, there isn't anything wrong with your monitor—I just like low-color screenshots that load stupid-fast!]
PSP
To use Chambara, the only required preliminary step is to draw a selection on your original image that specifically indicates the left and right edges of the DVD cover's spine. (The top and bottom edges of the selection are of no consequence.)
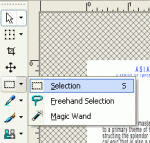
If you need to be precise, this is easiest done by first turning on rulers, guides, and “snap to guides.” Next, drag two guides from the left-hand ruler to mark the left and right edges of the spine. Zoom way in and fine tune the guide lines. Zoom back out. Use the selection tool to select all or part of the spine.
If you do not need to be precise (or are confused) then just draw a selection anywhere in the middle of your image and run a Chambara script. You will likely figure it out shortly.
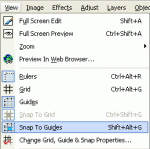 1.
Turn on Rulers, Guides, and Snap To Guides.
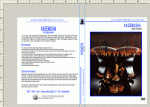 2.
Drag two guidelines from the left ruler to mark the spine.
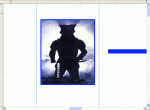 3.
Zoom in to fine tune guidelines.
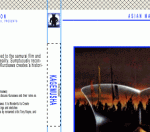 5.
Select all or part of the spine.
In PSP8, by far the easiest way to run scripts is to turn on the Script toolbar, select a script from the dropdown listbox, and click the run button. Alternatively, you can also run scripts from the File-->Script menu. If you need more help running a script, please refer to PSP help. If you need more help with a Chambara script, please use the forums at sourceforge.net.
Now, select one of the Chambara scripts to run (such as: Chambara - DVD - 0.25" Spine) and run it. Chambara will now take a few moments (PSP scripts can run a bit slow) to build a new DVD cover image with the spine squeezed or stretched to the selected width and everything else resized for printing at 100% scale.
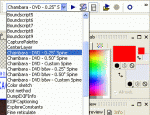 6.
Choose a Chambara script to run from the script toolbar.
![]() 7.
Run the script by clicking the run button.
7.
Run the script by clicking the run button.
If you run one of the scripts marked “Custom” the script will pop up a dialog asking for the custom spine width. The current limitation is between 0.01" and 5.0". This should be more than adequate.
 A
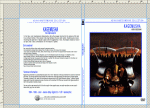
newly sliced cover with compressed spine ready for printing.
Chambara scripts will pop up a help message if you haven't made the necessary selection before running the script. This is no big deal. If you forget how to use a Chambara script, just run it and it will try to help you out. Chambara makes all changes to its own new image so you shouldn't need to worry about losing your work. Of course, however, no guarantees are made so save your originals in safe locations.
Don't forget to print at 100% scale, landscape orientation.
Hint: If your selection includes the entire spine, left to right and top to bottom, the script will also launch the print dialog for you.
Using Chambara As a Template Generator
This section is intended for advanced PSP users. Please don't ask questions about how to use Chambara as a template generator.
After running a Chambara script on any dummy image file you will find that the new image Chambara generated used three layers called Front, Spine, and Back (plus the backmost layer called Raster 1 that was not used).
In my opinion, the easiest way to use this new image as a template is to delete the three layers (Front, Spine, and Back) leaving Raster 1 and the guidelines as your template. Once you have done this, you can save this image for future use, or you can use it immediately to create your own cover (be sure to save as a Paint Shop Pro Image to retain the guidelines).
The easiest method to get your own artwork into the template is to open your artwork as a separate image (in PSP or any other program). Copy what you need to the clipboard (as a raster image). Return to the template and use the selection tool to select the entire space that you intend to paste into. Finally, to paste your artwork automatically stretched to fit, use the Paste Into Selection command (Ctrl+Shift+L).
If you paste by another method, you will likely need to use the Deform Tool to stretch your artwork manually to fit the guides. Also, be sure to zoom way in and double-check PSP's snapping ability.
Note: I recommend maximizing your drawing window inside the PSP workspace. This makes it easier to draw selections that include the edges (when zoomed out). Start your selection by clicking in the hash area outside the image, then drag across the image and snap it to your desired guideline. The selection will automatically shrink to the enclosed edges.
GIMP
[coming soon]
